Side Dishes
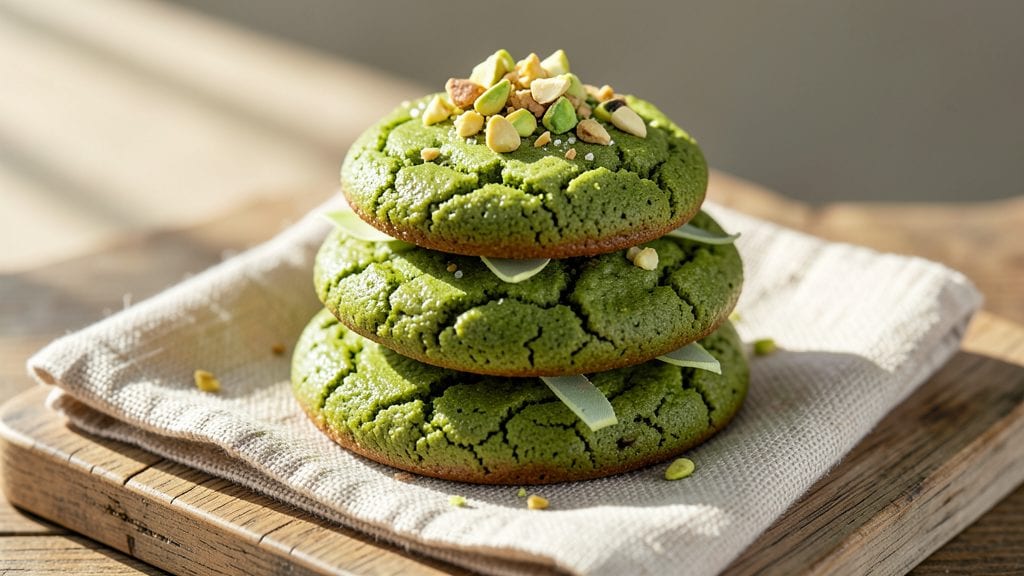
This green cookies recipe transforms your kitchen into a vibrant matcha mint haven with every bite—where earthy matcha meets bright mint and melts into crisp chocolate chips. ✨ The secret lies in balancing these flavors precisely, creating cookies that look as striking as they taste, with a subtle green hue that disappears into rich, satisfying sweetness.
What makes these cookies special is their perfect texture: tender yet sturdy enough to hold chocolate chips without turning mushy. Matcha provides that signature earthy depth, while mint keeps the flavor fresh and unexpected. The recipe uses simple ingredients but delivers restaurant-quality results—no fancy techniques required.
By the time they emerge from the oven, you’ll have golden-edged cookies with pockets of melted chocolate and a whisper of green throughout.
The aroma alone will have everyone asking for seconds, and the flavor profile—herbal, sweet, and slightly cooling—makes these perfect for holiday gifts, potlucks, or just a cozy afternoon treat.
For those with dietary preferences, a vegan version swaps butter for coconut oil and uses plant-based chocolate chips—just as delicious, with the same vibrant green magic. Let’s get baking!
Ingredients for green cookies
Simple ingredients transform into vibrant green cookies with earthy matcha and bright mint.
| Ingredient | Amount | Notes |
|---|---|---|
| All-Purpose Flour 🌾 | 2 cups | Sifted for light texture |
| Unsalted Butter 🧈 | 1 cup | Cold, cubed for even baking |
| Granulated Sugar 🍚 | ¾ cup | Superfine preferred for smoothness |
| Light Brown Sugar 🍚 | ½ cup | Packed for moisture |
| Matcha Powder 🍵 | 2 tbsp | Ceremonial grade for purity |
| Fresh Mint Leaves 🌿 | ¼ cup | Finely chopped, stems removed |
| Large Eggs 🥚 | 2 whole | Room temperature for blending |
| Pure Vanilla Extract 🌸 | 1 tsp | High-quality for flavor depth |
| Diamond Crystal Kosher Salt 🧂 | ½ tsp | Fine grain for even distribution |
| Baking Soda 🧪 | ½ tsp | Ensures proper rise |
| Semi-Sweet Chocolate Chips 🍫 | 1 ½ cups | Enjoy Life brand for allergy-free |
| Granulated Sugar (for rolling) 🍚 | ¼ cup | Coats edges for crunch |
The matcha powder is non-negotiable for that signature green hue and deep umami flavor. Ceremonial-grade matcha from Ippodo Tea or Marukyu-Koyamaen delivers the purest flavor without bitterness. For fresh mint, organic varieties from grocery store produce sections work best—avoid dried mint here, as it lacks the bright, crisp quality. The butter should be cold and cubed to prevent overmixing, which can lead to dense cookies. If you prefer a vegan version, coconut oil works well, but use it at room temperature for proper texture. The chocolate chips? Enjoy Life brand ensures allergy-friendly baking without compromising on quality.
No matcha powder? Spirulina powder at half the amount gives a similar green tint but with a distinctly oceanic flavor—use sparingly. Fresh mint unavailable? Dried mint at one-third the amount works in a pinch, though the flavor will be less vibrant. For a deeper matcha flavor, increase to 2.5 tbsp of matcha powder. The brown sugar should be packed for optimal moisture retention, while the granulated sugar should be superfine for a smoother cookie texture. If you don’t have superfine sugar, pulse regular granulated sugar in a food processor for 30 seconds. The baking soda and salt are critical for balancing flavors—Diamond Crystal kosher salt is preferred for its fine grain and consistent flavor.
Store baked cookies in an airtight container at room temperature for up to 5 days to maintain their crisp edges and chewy centers. For longer storage, freeze portions on a parchment-lined tray before transferring to a sealed bag—this preserves texture for up to 3 months. To reheat, simply place cookies on a baking sheet in a 350°F oven for 2-3 minutes. These cookies also make fantastic holiday gifts—package them in clear cellophane bags tied with green ribbon for a festive touch. The vibrant green color fades slightly as they cool, revealing the rich chocolate chips within.
Why You'll Love This Recipe
- No-Mess Mixing: I swear by the creamy butter-and-sugar combo here—it’s the kind of dough that comes together in seconds with just a fork. No food processor, no overworking, just a few minutes of stirring while you sip your morning coffee.
- Earthy Sweetness: That first bite? It’s like biting into a mocha cake but with the bright, grassy lift of matcha—sweet but not cloying, with just enough depth to keep you reaching. Honestly, the brown sugar caramelizes in a way that makes these taste homemade even if you’re not.
- Office Snack Hero: Between us, these are my go-to for work lunches—pack a dozen in a tin, and they’ll stay fresh for days. They’re sturdy enough to handle a desk drawer but still taste like a treat, not a sad, stale cookie.
- Budget-Friendly Batch: A single box of matcha powder stretches for two batches, and the rest? Pantry staples. I’ve made these for holidays, book club meetups, and even my kid’s birthday—always with leftovers because they disappear so fast.
Step-by-step instructions for matcha mint cookies with chocolate chips
Master these precise techniques for vibrant green cookies with perfect texture and balanced flavor.
👨🍳 Step 1: Prepare the Matcha-Mint Dough Base
In a medium bowl, whisk together the 2 cups all-purpose flour, 0.5 tsp baking soda, and 0.5 tsp diamond crystal kosher salt. Sift the mixture through a fine-mesh sieve directly into a large mixing bowl to aerate the flour and prevent dense cookies. This step creates the light, tender crumb these cookies are known for.
In a separate heatproof bowl, melt the 1 cup unsalted butter over simmering water (bain-marie) until just liquid, then remove from heat. Let it cool for 5 minutes until warm to the touch but not hot. This prevents scrambling the eggs when combined. In the same bowl, whisk in the 0.75 cup granulated sugar, 0.5 cup light brown sugar, and 2 tbsp matcha powder until fully dissolved and smooth.
🍳 Step 2: Combine Wet Ingredients and Incorporate Mint
Add the 2 whole large eggs one at a time, whisking vigorously after each addition until fully incorporated. The mixture should thicken slightly and become pale green in color. Stir in the 1 tsp pure vanilla extract and 0.25 cup finely chopped fresh mint leaves, pressing the mint against the sides of the bowl to extract maximum flavor. The dough will develop a bright green hue and fresh aroma.
Gradually add the dry flour mixture to the wet ingredients, mixing with a silicone spatula just until combined. Avoid overmixing—you'll still see some flour streaks. Fold in the 1.5 cups semi-sweet chocolate chips using a gentle folding motion to distribute them evenly throughout the dough. The chocolate should be dispersed in clusters rather than uniformly spread for optimal texture.
⏰ Step 3: Chill for Optimal Texture
Cover the dough bowl tightly with plastic wrap and refrigerate for at least 1 hour, or up to 24 hours for enhanced flavor development. This crucial step allows the gluten to relax, preventing excessive spreading during baking. The dough should firm up noticeably and become easier to handle. I like to press the dough gently—if it springs back slowly, it's ready to bake.
While the dough chills, preheat your oven to 350°F and line two baking sheets with parchment paper. The oven should be fully preheated before the dough goes in—this ensures even baking and proper cookie rise. Place the baking sheets on the middle rack to allow even heat circulation around the cookies.
🔥 Step 4: Bake to Golden Perfection
Using a 2-tablespoon cookie scoop, portion the chilled dough onto the prepared baking sheets, spacing the cookies 2 inches apart to allow for spreading. Roll each cookie gently in the 0.25 cup granulated sugar for rolling, pressing lightly to adhere. This creates the signature crunchy edges while adding a subtle sweet contrast to the matcha-mint flavor.
Bake for 10-12 minutes until the edges are golden brown and the centers still appear slightly underbaked. The tops should be crackly with a slight dome shape. Rotate the baking sheets halfway through for even baking—this is especially important as the matcha can cause uneven color development. Remove the cookies when they're still slightly soft in the center; they'll firm up as they cool.
⏰ Step 5: Cool and Enjoy
Transfer the cookies to a wire rack and let them cool completely for 15 minutes before serving. This resting period allows the flavors to meld and the textures to set properly. The cookies should have a vibrant green hue from the matcha, with visible mint flecks throughout. Each bite should deliver a harmonious balance of earthy matcha, refreshing mint, sweet sugar, and rich chocolate.
For best results, store cookies in an airtight container at room temperature for up to 5 days. The flavors deepen over time, making them even more complex the next day. These cookies pair beautifully with a cup of hot matcha tea or a glass of cold milk for a perfect flavor contrast.
Pro Tips For Making Green Cookies
- Sift the Matcha: DESCRIPTION: I learned this the hard way—dumping matcha powder directly into the butter makes clumps that ruin the texture. Whisk it into the flour first, then mix everything together. This ensures an even green color and prevents bitter pockets.
- Cream Butter Cold: DESCRIPTION: If your butter’s too soft, you’ll end up with dense, cakey cookies instead of chewy ones. Pop it in the freezer for 10 minutes before creaming—this keeps the fat firm enough to hold air properly. (Yes, even if you’re impatient like me.)
- Skip Overmixing: DESCRIPTION: The moment the dough starts looking streaky, stop. Overworking the flour develops gluten, which turns your cookies into tough crackers. Just fold until combined—about 10-12 strokes max.
- Use a Scale: DESCRIPTION: Measuring flour by scooping and scooping leads to inconsistent batches. A kitchen scale guarantees accuracy—especially with matcha, where precision matters. Two grams here or there changes the flavor balance. (Your future self will thank you.)
Essential equipment for green cookies
Mixing Essentials
The right tools make all the difference when blending matcha and mint into a cohesive dough. I swear by a KitchenAid stand mixer with the paddle attachment for combining wet ingredients—it emulsifies the butter, sugar, and eggs perfectly without overworking the gluten.
For hand mixers, a Cuisinart HM-90BCS with a whisk attachment works just as well, though I recommend mixing in a large stainless steel bowl to prevent color transfer from plastic.
For sifting the dry ingredients, a fine-mesh sieve like the OXO Good Grips is a game-changer. It aerates the flour beautifully, ensuring light, tender cookies. If you don’t have a sieve, a handheld flour sifter (like the Microplane) works in a pinch.
The key is to sift directly into your mixing bowl to avoid clumps—this step is non-negotiable for that signature texture. 🌿
Portioning Tools
A 2-tablespoon cookie scoop (like the OXO Good Grips) is your best friend for evenly portioned cookies. I use it to scoop the chilled dough directly onto the baking sheet, ensuring consistent size and shape.
For rolling the cookies in sugar, a small plate or shallow bowl works perfectly—just dip the scoop into the sugar and press lightly to coat. If you don’t have a scoop, a round cookie cutter or even a spoon can work, though the edges may be less uniform.
For shaping, I recommend parchment paper (like If You Care) to prevent sticking and ensure easy release. Line your baking sheets before preheating the oven—this saves time and frustration later. Pro tip: Use two baking sheets at once to maximize oven space and bake in batches if needed.
The 350°F oven temperature is critical, so invest in an instant-read thermometer (like Thermoworks ThermoPop) to confirm accuracy. 🔥
Chilling Gear
Chilling the dough is where patience pays off, and the right container makes it effortless. I use a large glass baking dish (like Pyrex) or a rectangular plastic container (like Rubbermaid) with a tight-sealing lid.
Place the dough in a single layer and press plastic wrap directly against the surface to prevent a skin from forming. For longer chilling (up to 24 hours), I transfer the dough to the fridge’s coldest shelf for even cooling.
Avoid aluminum foil for chilling—it can react with the butter and alter flavors. If you’re short on time, a freezer-safe container works for up to 1 hour of quick chilling, though the texture won’t be as firm as fridge-chilled dough.
The goal is to firm the dough enough to handle without over-chilling, which can lead to dry cookies. 💡
Baking Must-Haves
Your oven’s performance is the final piece of the puzzle, so equip yourself with a digital oven thermometer to ensure 350°F accuracy. I also recommend silicon baking mats (like Eco-Products) for an alternative to parchment—just be sure to use them on the middle rack for even heat distribution.
For rotating baking sheets halfway through, I place a small oven mitt on the rack handle to avoid burns. This step is crucial for even browning, especially with matcha’s tendency to darken unevenly.
Finally, a wire cooling rack (like OXO Good Grips) is essential for proper cooling. It allows air to circulate underneath, preventing soggy bottoms. I like to place the rack directly on the counter for 15 minutes of cooling before transferring cookies to an airtight container for storage.
The contrast between the warm, fragrant cookies and the cool rack enhances the flavor development. ✨
Nutrition facts
Frequently asked questions
Why do these cookies turn green?
The vibrant green color comes from matcha powder and fresh mint. Matcha provides the deep green hue and earthy flavor, while mint adds bright freshness. The color intensifies when combined with the dough but mellows slightly as the cookies bake and cool. For a more subtle green tint, reduce the matcha to 1.5 tbsp.
Can I make these cookies without matcha?
Yes! For a similar green effect, use 1 tbsp spirulina powder (half the amount) or food coloring (1-2 drops of green gel). However, spirulina has a distinct oceanic flavor, so matcha is ideal for authentic taste. If you prefer no green at all, omit both and increase vanilla to 1.5 tsp for extra aroma.
How do I prevent my cookies from spreading too much?
Chilling the dough for at least 1 hour is key—this relaxes the gluten. Use a 2-tablespoon scoop for consistent portions and bake at 350°F for 10-12 minutes. For extra structure, replace 0.25 cup of all-purpose flour with 0.25 cup cornstarch. Avoid overmixing the dough to keep cookies thick and chewy.
Are these cookies vegan-friendly?
Easily! Swap the 1 cup butter for 1 cup coconut oil (solid at room temp) and use vegan chocolate chips. The texture remains the same, though vegan cookies may spread slightly more. For extra richness, add 1 tbsp flaxseed meal + 3 tbsp water (replacing 1 egg) and let it thicken for 5 minutes before mixing.
Why do my cookies taste bitter?
Bitter flavors usually come from too much matcha or overbaking. Use ceremonial-grade matcha (not culinary-grade) and stick to 2 tbsp. Bake for 10-12 minutes until edges are golden but centers are still soft. If the bitterness persists, reduce matcha to 1.5 tbsp and add 0.5 tsp vanilla bean paste to balance.